
The Most Comprehensive Guide - APISIX Blue-Green Deployment
Repost license
Request authorization before reposting and retain the authorization code, original URL, and go/affiliate links.
Original URL:https://www.geekcorelab.com/post/the-most-comprehensive-and-informative-product-on-the
The commercial link is an authorized go short link that must stay on the reposted page. It records the source before sending readers to the original article.
In real environments, upgrades are often fraught with risk. In some cases, the entire service may crash immediately after an update. If you use something like Docker, it's not too bad—you can roll back to a previous version using tags—but there will always be some downtime. In such cases, we can try blue-green deployment.
Official Documentation's Description/Usage of Blue-Green Deployment
Blue-Green Deployment
In a blue-green deployment scenario, you need to maintain two environments. Once new changes are tested and accepted in the blue environment (staging), user traffic is shifted from the green environment (production) to the blue environment.
The following example shows how to configure match rules based on request headers:
curl http://127.0.0.1:9180/apisix/admin/routes/1 \
-H "X-API-KEY: $admin_key" -X PUT -d '
{
    "uri": "/index.html",
    "plugins": {
        "traffic-split": {
            "rules": [
                {
                    "match": [
                        {
                            "vars": [
                                ["http_release","==","new_release"]
                            ]
                        }
                    ],
                    "weighted_upstreams": [
                        {
                            "upstream": {
                                "name": "upstream_A",
                                "type": "roundrobin",
                                "nodes": {
                                    "127.0.0.1:1981":10
                                }
                            }
                        }
                    ]
                }
            ]
        }
    },
    "upstream": {
            "type": "roundrobin",
            "nodes": {
                "127.0.0.1:1980": 1
            }
    }
}'
Testing
- Send a request using the
curlcommand. If the request carries a release header with the valuenew_release, it will be directed to the new upstream service configured on the plugin:
curl http://127.0.0.1:9080/index.html -H 'release: new_release' -i
HTTP/1.1 200 OK
Content-Type: text/html; charset=utf-8
...
world 1981
- Otherwise, the request will be directed to another upstream service configured on the route:
curl http://127.0.0.1:9080/index.html -H 'release: old_release' -i
HTTP/1.1 200 OK
Content-Type: text/html; charset=utf-8
...
hello 1980
Blue-Green Deployment Process
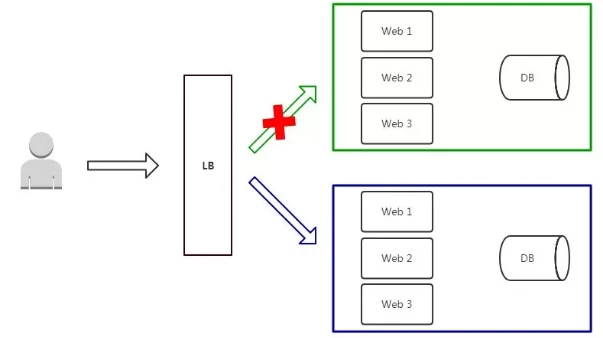
First, under normal circumstances, there is a load balancer (LB), and the backend is served by both the blue group and the green group. To perform a blue-green deployment, you first need to remove the green group from the load balancer, meaning no traffic will be forwarded to the green group. At this point, upgrade the green group.
After the upgrade is complete, add the green group back to the load balancer, then remove the blue group from the load balancer and upgrade the blue group. This is blue-green deployment.
Practical Application
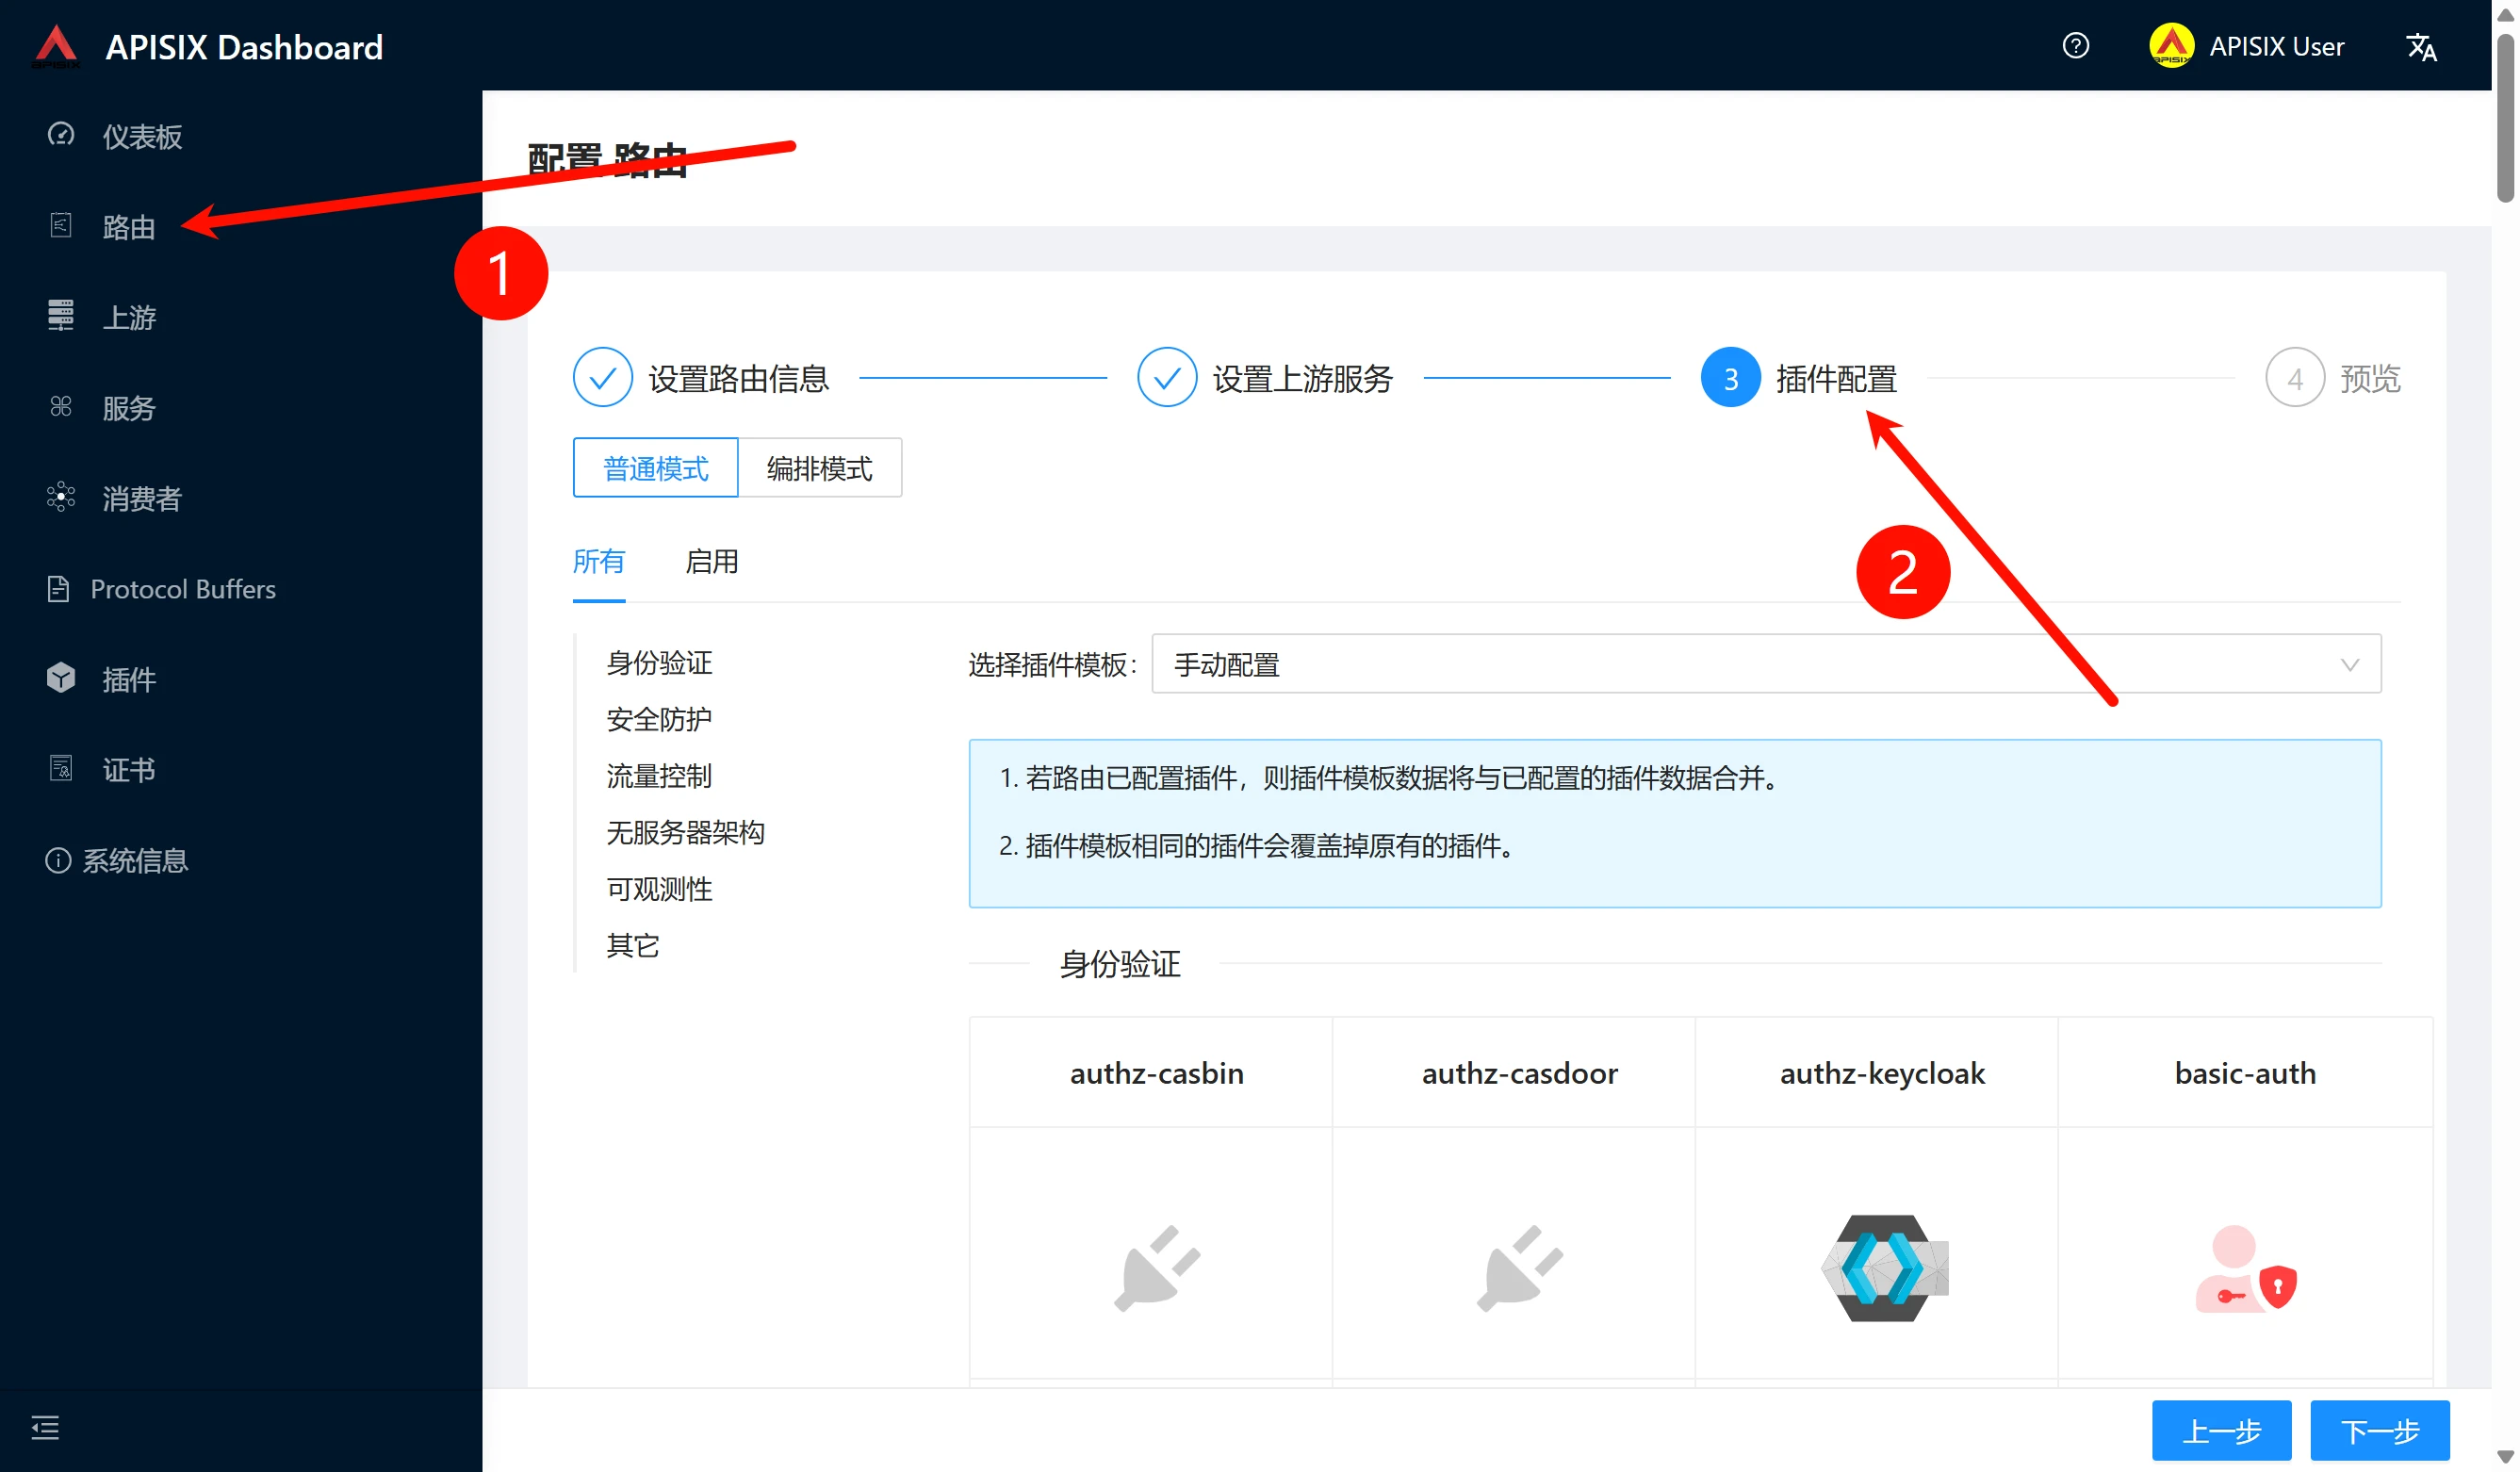
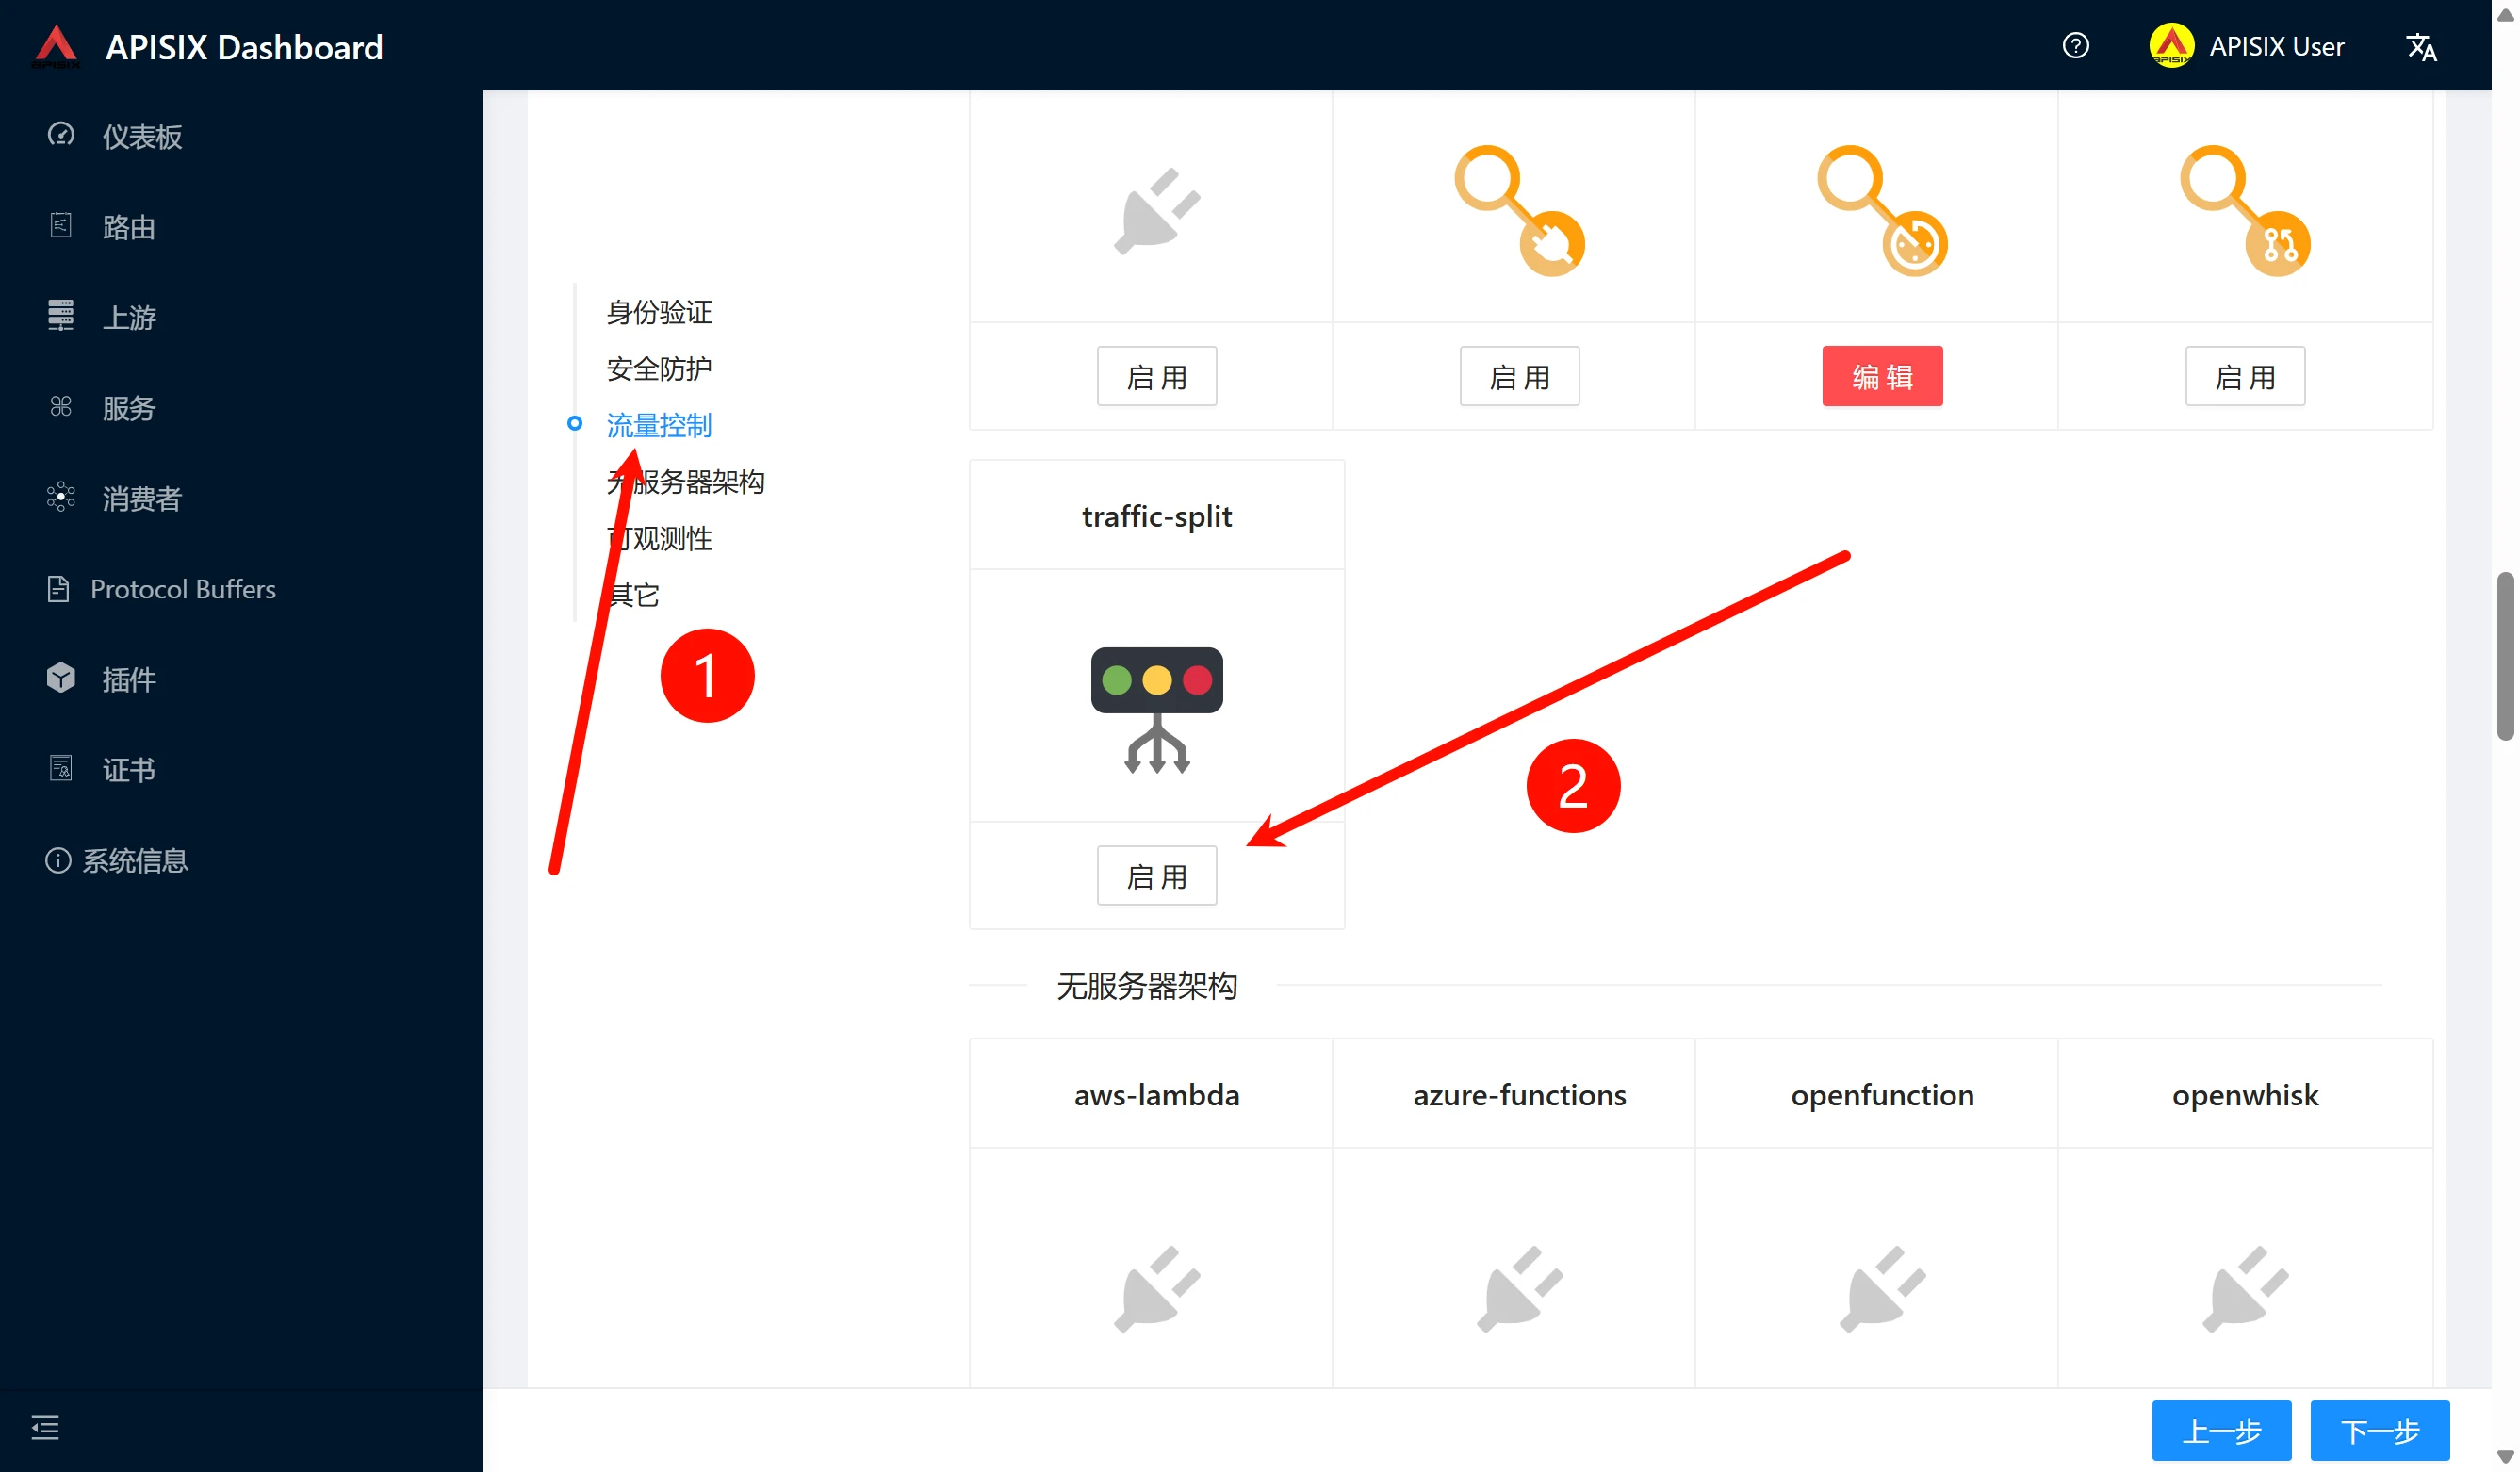
When configuring a route, scroll down to the plugin configuration section and find the traffic-split plugin
After enabling the plugin, write the configuration file below
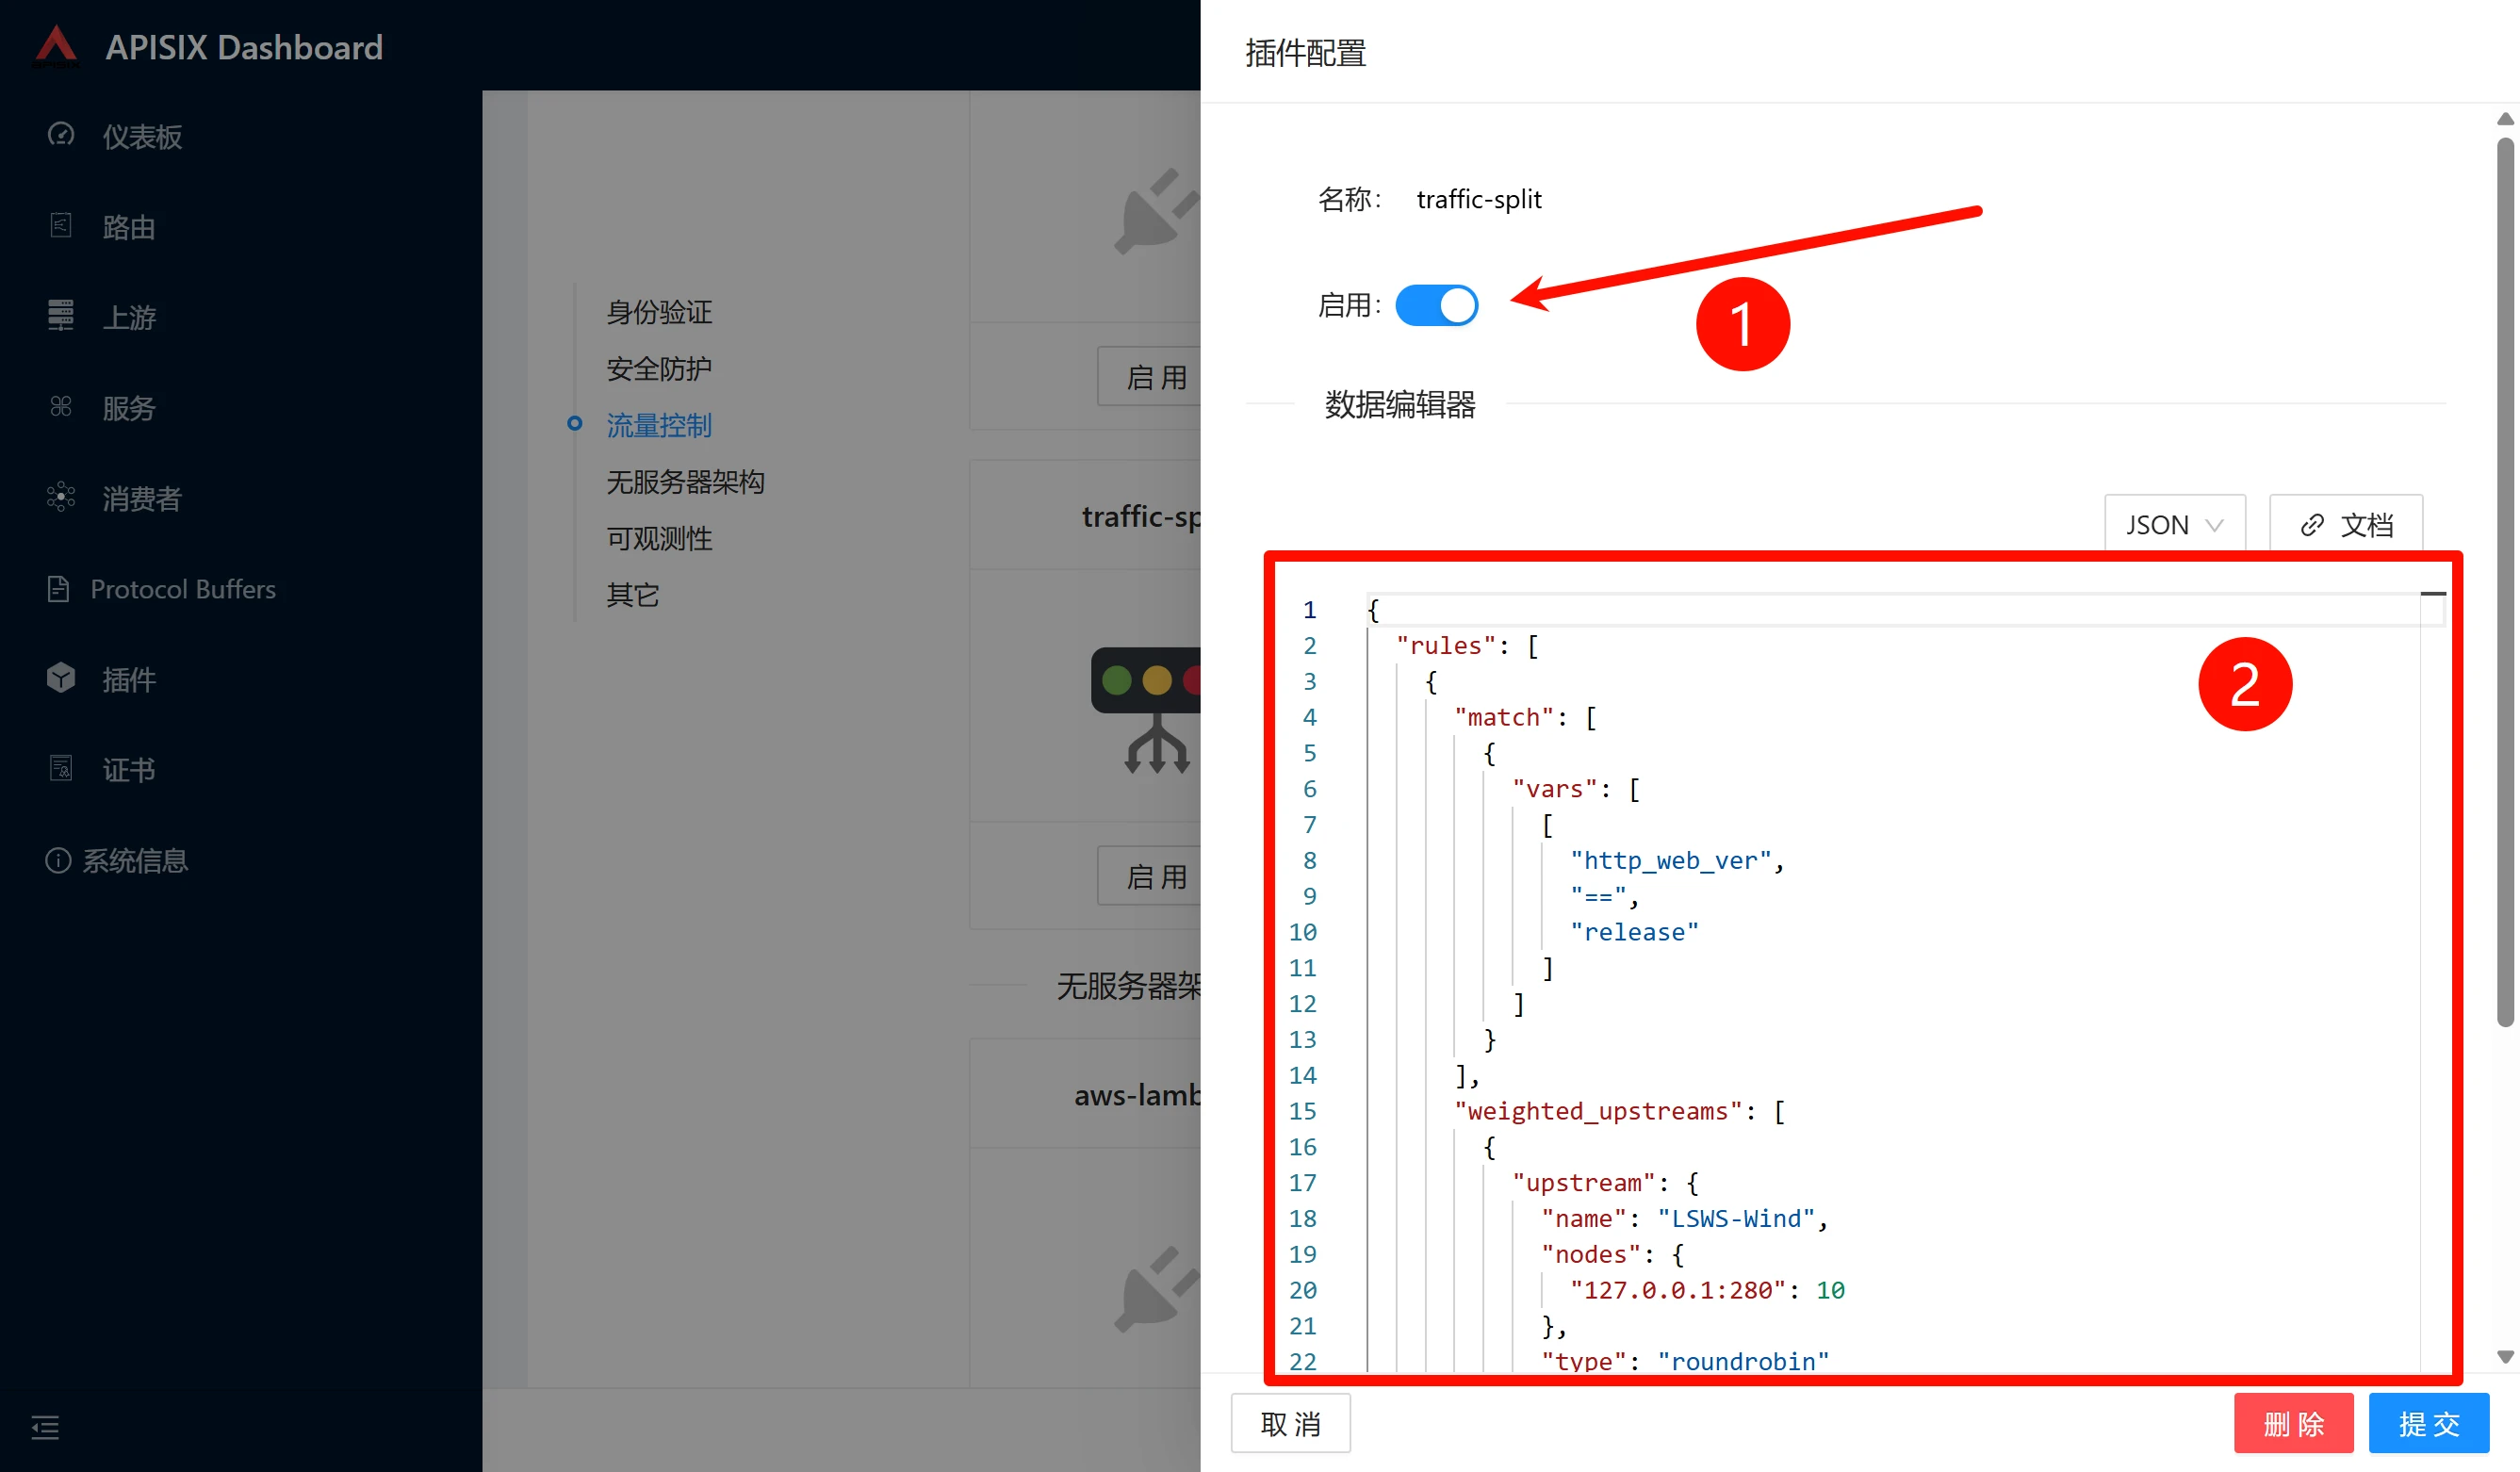
{
  "rules": [
    {
      "match": [
        {
          "vars": [
            [
              "http头、变量",
              "判断方式",
              "参数值"
            ]
          ]
        }
      ],
      "weighted_upstreams": [
        {
          "upstream": {
            "name": "服务的名字,随便起,和Web上显示的那个上游不是一个东西",
            "nodes": {
              "上游IP:端口": 权重
            },
            "type": "算法"
          }
        }
      ]
    }
  ]
}
"type": "roundrobin" is the type of traffic routing mechanism; roundrobin indicates weight-based load balancing, and chash indicates consistent hashing.
The HTTP headers and variables in vars are named consistently with NGINX's internal variables, so you can also use request_uri, host, etc. However, if you want to use some HTTP headers or custom headers, you should add the http_ prefix, for example “http_x_real_ip”,“http_x_web_version”
The parameter value is just a string, which can be a version number, IP address, etc.
There are many matching methods, for example the vars in this official example
"vars": [
    ["arg_name2","==","rose"],
    ["http_user-id2","!",">","33"],
    ["http_apisix-key2","~~","[a-z]+"]
]
"==" means exact match, "!" means no match, ">" means greater than a certain value, and "~~" means matching using a regular expression
The matching logic is “AND within, OR between”: all conditions within each vars must match for that vars to be considered a hit. Similarly, you can configure multiple vars; if any one of the multiple vars matches, the rule is considered hit and traffic is directed accordingly. Otherwise, no traffic routing will be performed, and traffic will continue to be sent to the original service instead of the new service.
This is an example with multiple vars
{
            "rules": [
                {
                    "match": [
                        {
                            "vars": [
                                ["http_x-api-id","==","1"]
                            ]
                        }
                    ],
                    "weighted_upstreams": [
                        {
                            "upstream": {
                                "name": "upstream-A",
                                "type": "roundrobin",
                                "nodes": {
                                    "127.0.0.1:1981":1
                                }
                            },
                            "weight": 3
                        }
                    ]
                },
                {
                    "match": [
                        {
                            "vars": [
                                ["http_x-api-id","==","2"]
                            ]
                        }
                    ],
                    "weighted_upstreams": [
                        {
                            "upstream": {
                                "name": "upstream-B",
                                "type": "roundrobin",
                                "nodes": {
                                    "127.0.0.1:1982":1
                                }
                            },
                            "weight": 3
                        }
                    ]
                }
            ]
        }
Disable Plugin but Keep Configuration
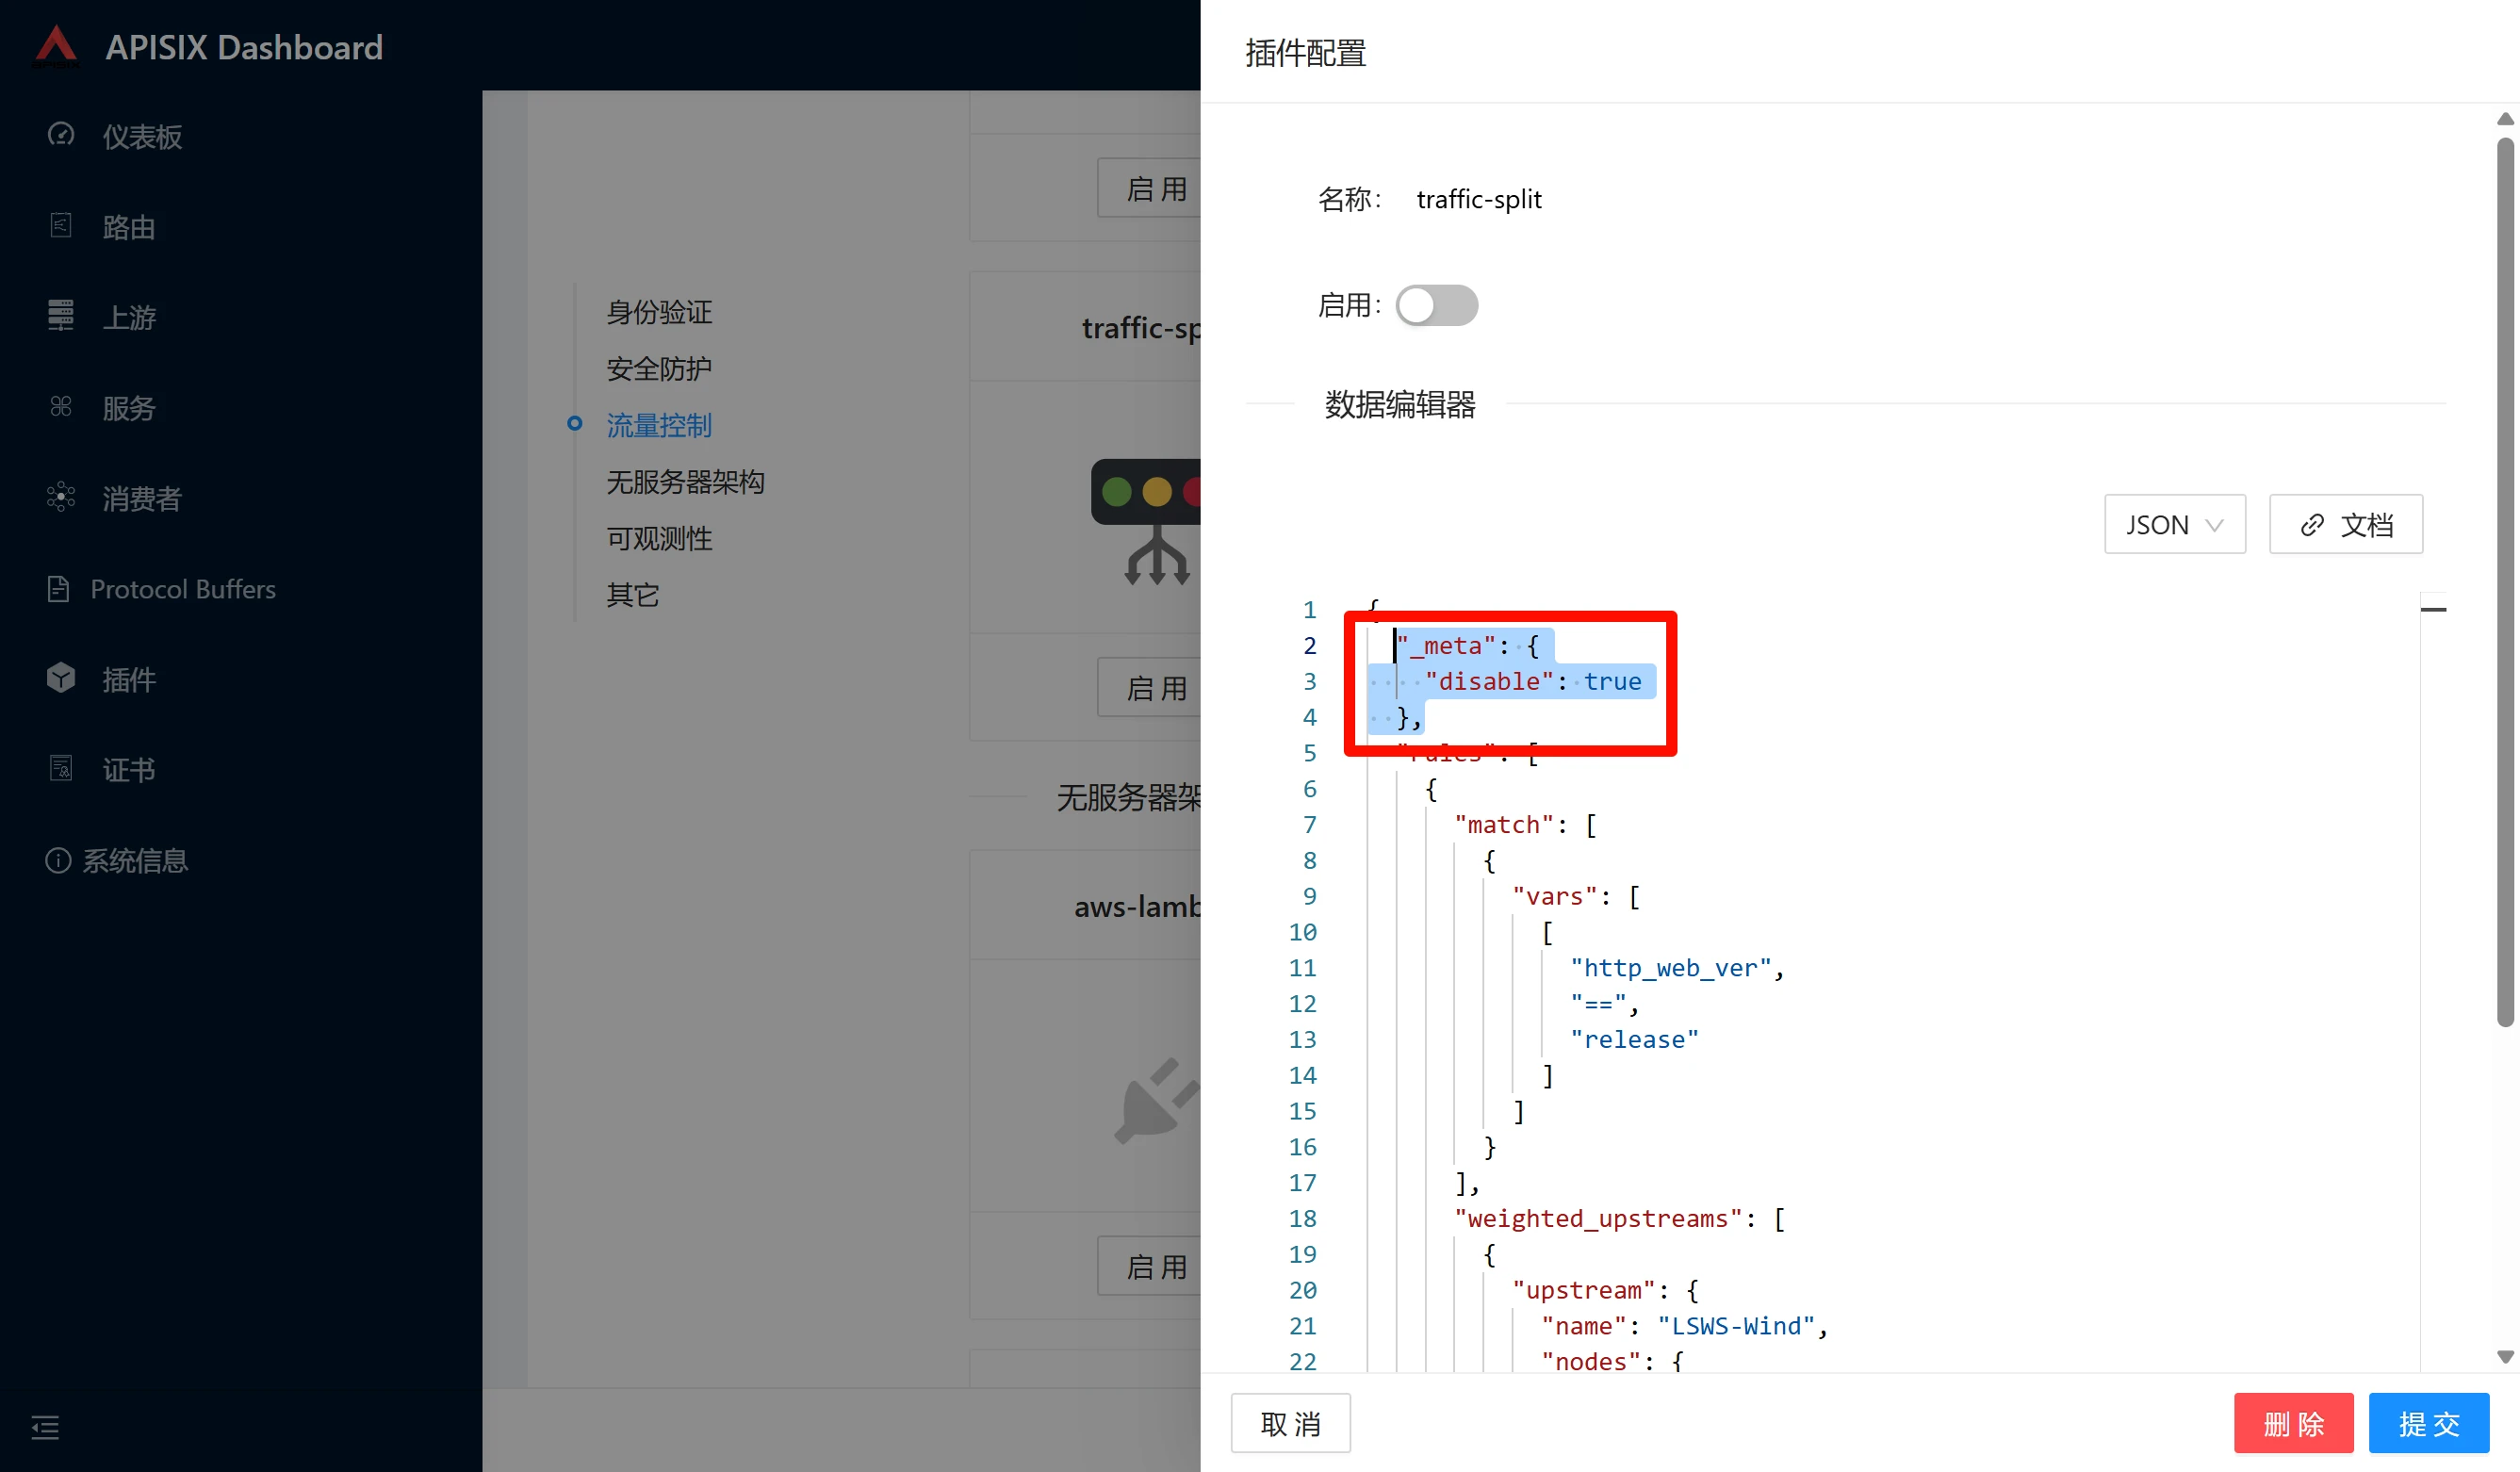
The official documentation provides a way to delete a plugin, but in some cases we only want to disable the plugin, not delete its configuration. For example, if testing after this blue-green deployment reveals a problem and we need to roll back to the previous version to continue providing service, but we still need to perform blue-green deployment after the bug is fixed, then we can disable the plugin without deleting the configuration (the same applies to WebUI and API requests).
First, after saving the plugin configuration and opening it again, you will find an extra _meta
In general, do not manually change this, otherwise problems may occur. What we need to change is the state of the “Enable” switch above. APISIX will automatically change this value to achieve disabling the plugin while keeping the configuration. For users who do not deploy the WebUI, you can use the PUT method to update by directly requesting the API.
Comments
Discussion
Be kind and keep the discussion friendly.
Discussion
0 comments